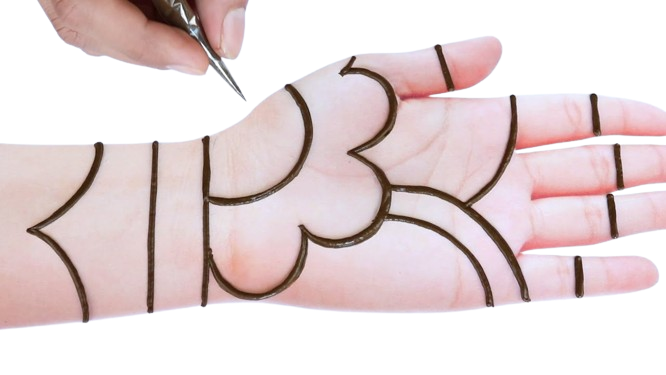
Simple Mehndi Designs for Beginners: A Step-by-Step Guide
Introduction
Mehndi, also known as henna, is a beautiful art form that has been cherished for centuries, especially in South Asian and Middle Eastern cultures. It’s often applied during festive occasions like weddings, festivals, and religious events. If you’re new to this art and looking for simple mehndi designs for beginners, you’ve come to the right place. In this guide, we will walk you through some easy yet elegant mehndi designs that you can try on your own. Whether you’re preparing for a special occasion or just want to explore this artistic tradition, these designs are perfect for beginners.

Why Choose Simple Mehndi Designs?
For those new to mehndi, simple designs offer an excellent starting point. They are not only easy to create but also require less time and effort. Simple mehndi designs are characterized by basic shapes, lines, and patterns that can still look incredibly graceful. These designs are perfect for beginners because they help build confidence and skills before moving on to more complex patterns.
Tools You’ll Need to Get Started
Before you begin creating your mehndi designs, make sure you have the following tools:
- Mehndi Cone: This is the applicator filled with henna paste. It’s used to draw designs on the skin.
- Cotton Swabs: Handy for cleaning up any mistakes.
- Lemon-Sugar Solution: Helps to keep the henna moist for better color penetration.
- Tissue Paper: For wiping hands and excess henna.
- Clear Tape: Optional, for fixing designs temporarily.
Basic Techniques for Simple Mehndi Designs
1. Practice Lines and Dots
The foundation of any mehndi design is built on lines and dots. Practice drawing straight lines, curves, and dots of different sizes on a piece of paper. This will help you get a steady hand and better control over the mehndi cone.
2. Start with Basic Shapes
Begin with basic shapes like circles, squares, and triangles. These shapes form the basis of many traditional mehndi designs. Practice creating these shapes on your hand or a practice sheet to gain confidence.
3. Experiment with Floral Patterns
Floral patterns are a popular choice in mehndi designs. Start with a simple flower, like a five-petal design, and then gradually add details such as leaves and vines. These elements are easy to draw and can be combined in various ways to create beautiful designs.
4. Incorporate Simple Motifs
Motifs like paisleys, spirals, and geometric shapes are commonly used in simple mehndi designs. They are not only easy to draw but also add a touch of elegance to your design. Practice drawing these motifs separately and then integrate them into your patterns.
Step-by-Step Simple Mehndi Design for Beginners
1. Simple Finger Design
- Start by creating a small dot on the tip of your finger.
- Draw a line from the dot towards the middle of your finger.
- Add small leaves or teardrop shapes along the line.
- You can also draw tiny dots around the line to enhance the design.
2. Basic Floral Design for Back of the Hand
- Draw a small circle in the center of the back of your hand.
- Surround the circle with five small petals.
- Add leaves and small dots around the petals to fill the empty space.
- Extend a vine with leaves from the flower towards your wrist.
3. Simple Bracelet Style Design
- Draw a straight line across your wrist to resemble a bracelet.
- Add a series of small loops or semi-circles along the line.
- Draw a second line below the first one, mirroring the design.
- Fill in the space between the two lines with dots or small floral patterns.
4. Easy Palm Design
- Start by drawing a large floral motif in the center of your palm.
- Extend vines with leaves from the flower towards the fingers.
- Add small dots around the design to fill in gaps.
- You can draw simple paisley shapes near the wrist to enhance the look.
Tips for Applying Mehndi Designs
- Clean Hands: Ensure your hands are clean and dry before starting. This helps the henna adhere better.
- Practice Patience: Take your time to create each design. Rushing may lead to mistakes.
- Keep It Simple: As a beginner, stick to simple designs. Complicated patterns can be frustrating.
- Use Reference Images: Look at simple mehndi design images for inspiration and guidance.
- Let It Dry: After applying the mehndi, let it dry completely. Avoid smudging the design.
- Apply Lemon-Sugar Solution: Dab the lemon-sugar mixture over the dried henna to deepen the color.
Removing Mehndi and Aftercare Tips
- Natural Removal: Let the mehndi dry and fall off naturally. Scraping it off too soon may affect the color.
- Avoid Water: Refrain from washing your hands with water immediately after removing the mehndi.
- Apply Oil: Use coconut oil or mustard oil to help remove the dried henna and enhance the color.
- Keep Warm: Warmth can intensify the color of mehndi, so keep your hands warm.
Conclusion
Simple mehndi designs for beginners are a fantastic way to learn and appreciate this beautiful art form. With a bit of practice and creativity, you can create stunning designs that are sure to impress. Whether you’re preparing for a festive occasion or just exploring your artistic side, these simple mehndi designs will help you get started on your henna journey. So grab a mehndi cone and start creating your masterpiece today!

Download the Pankhudi Henna App Today!
Ready to unleash your creativity? Download the Pankhudi Henna app now from the Play Store and explore endless henna design possibilities. Whether you’re a novice or a seasoned henna artist, our app is tailored to meet your needs.Download Pankhudi Henna App Join our community of henna lovers and start your journey with Pankhudi Henna today!


